

If you are using ZHA (Zigbee Home Automation) to automate your Zigbee devices, you should remove this and use Zigbee2MQTT instead.
Why? It gives you much more info about your connected devices as you get access to all sensor values.
Some examples:
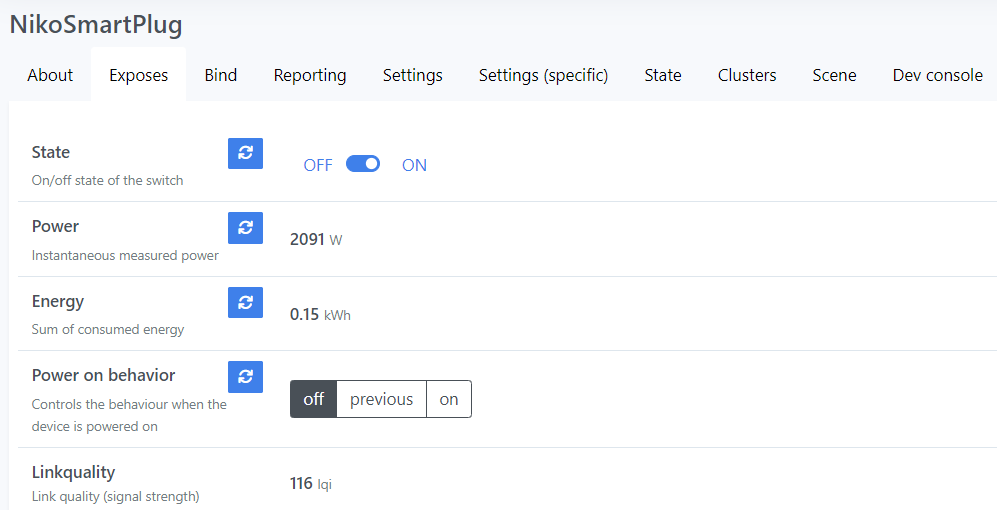
- Two years ago I bought this Niko smart plug with the idea to monitor the energy consumption of a washing machine so I could be notified when that thing was finished doing his job. At that time, I only had deCONZ installed with a Conbee II USB stick. The only automation possible was to switch the plug on or off, no sensor values were available. After Zigbee2MQTT was installed, the proper sensor values became available:

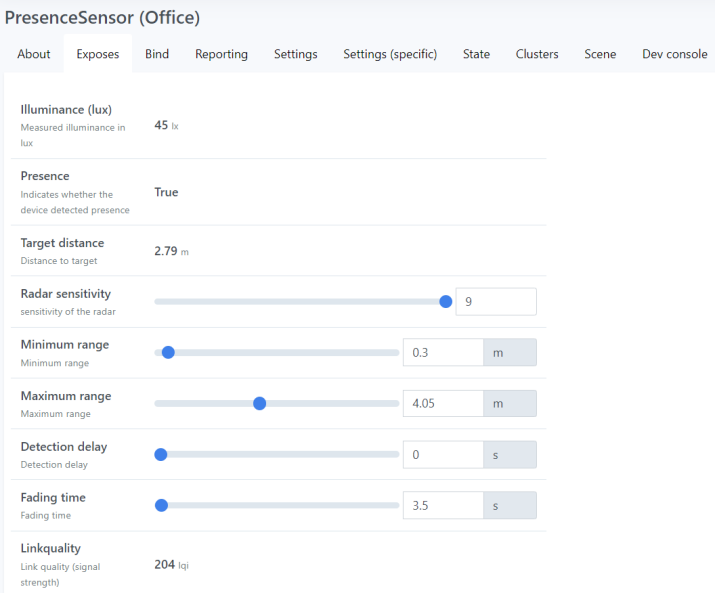
- I bought this presence sensor on AliExpress some weeks ago (had to order it twice, as the first time I ordered the wifi version). With the ZHA implementation (this time using ZHA and the SkyConnect USB dongle), none of the settings could be modified. With Zigbee2MQTT, all are exposed:

Zigbee2MQTT configuration
- Zigbee2MQTT requires a MQTT broker. In my case, I had the Mosquitto broker already installed, as it was needed for Frigate (an open source NVR built around real-time AI object detection).
- I couldn’t get it working while the ZMA integration was still active. It probably makes sense but it took a while to find out that I had to remove the existing ZMA service.
- It was not clear what to fill in in the configuration file in the sections mqtt and serial (the socat section was filled in automatically). In the serial section, you have to fill in your Zigbee gateway. As I have 2 installed, I searched for the SkyConnect port name in HA via Settings ➡ System ➡ Hardware ➡ All hardware.
In the mqtt section you fill in the details to connect to your MQTT broker. In my case, I used the same user as the Frigate add-on is using.
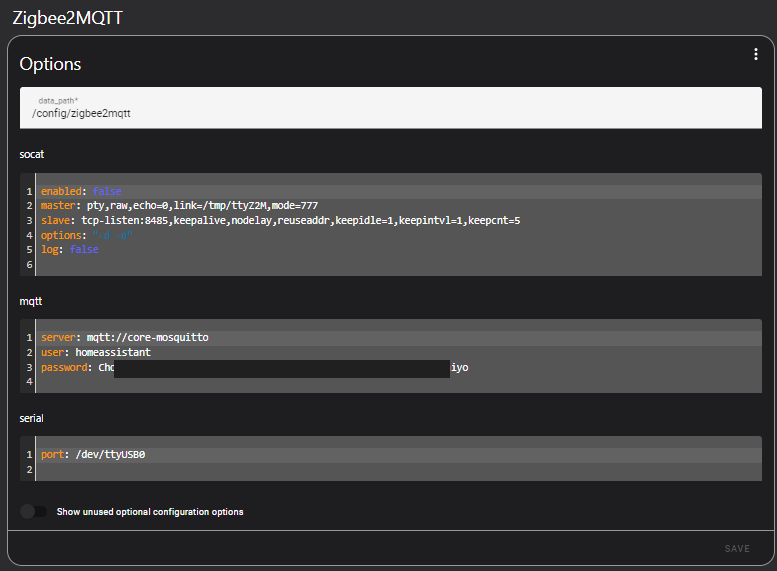
- Maybe I was tampering too much with the configuration to get it working, because when looked at the \config\zigbee2mqtt\configuration.yaml file, I noticed some old settings. So I removed the existing yaml file and started over with entering the configuration details via the add-on UI.